Format your scientific paper in just a few steps
Format your scientific paper in just a few steps
In order to score points with a bachelor’s thesis, master’s thesis, diploma thesis or doctoral dissertation, very specific formatting is prescribed. Even the brightest minds sometimes despair of setting the correct page numbering or margins in Word. Aren’t there a few tricks in Microsoft Office 365 Home or Microsoft Word for formatting your academic work without risking a nervous breakdown? Yes, there are – and we’ll show you what they are.
Which areas do you need to format for a scientific paper?
Depending on the university, it is possible that there are very specific requirements as to what the formatting in Word should look like. Therefore, it is helpful to find out exactly what the university’s requirements are before formatting the document for the academic paper. In general, however, you must always keep these points in mind when formatting a scientific paper:
- Font and font size
- Line spacing
- Page margins
- Page numbering
- Cover page
With formatting in Word, it’s basically quite simple – if you know how!
Formatting font and font size
If you want to format a scientific paper, you should make sure to choose a consistent font that is easy to read. Usually, the sometimes somewhat old-fashioned serif font Times New Roman or the modern sans-serif Arial are used. For body text, the font should be used in 12 point, for headings 14 point.
Choose the right line spacing
The texts are formatted as justified text, i.e. flush on the left and right so that nothing flutters at the edges. As a rule, the line spacing is 1.5; only for footnotes can a single line spacing be chosen. Remember the margins Especially in justified type, it is important that the margins – the space between the letters and the edge of the page – are large enough, because this makes reading easier. Before starting to write, the document should be set up so that the following margins are pre-formulated:
- top and bottom margins 2 to 2.5 cm each
- left margin 3 to 3.5 cm
- right margin 2 to 2.5 cm
Formatting your scientific paper and setting page numbers
First things first: Neither the cover page nor the table of contents are given a page number (pagination). Depending on how the bachelor’s or doctoral thesis, etc., is structured, pagination may begin on the third page or on the page containing the introduction. The page number is set in the formatting in the middle of the footer or right-justified. In order to start page numbering only from page 3 when formatting in Word, a few steps are necessary:
- a section break is inserted on page 2
- the footer must not be linked to the previous footer
- now start with the command „Format page numbers“ from 1

How to make the cover page work
Pretty much every university requires a cover sheet for academic papers. It contains the most important key data and should give the examiners a quick overview of the formal aspects of the work. In a way, it’s like the cover of a book: it has to make a good first impression! The cover sheet must include the following information:
- The type of thesis (Bachelor’s thesis, Master’s thesis, doctoral thesis, etc.)
- the title and possibly a subtitle of the academic paper
- Name of the university, if possible also the logo in very good print quality
- The name of the author of the thesis and his/her matriculation number
- the author’s contact details
- the names of the persons who supervised the author during his or her work
- if available, the name of the second corrector
- Name of the degree programme or department
- Date of submission
Tip: How to structure a Bachelor's or Master's thesis
With these forms of academic work, the correct outline is crucial if you want to achieve a good grade. Usually, the outline looks like this:
- Cover page
- Abstract (preface/introduction)
- Table of contents
- List of images used (if any)
- List of tables used (if available)
- List of abbreviations
- Continuous text divided into
- Introduction
- theoretical framework
- Methodology
- Results
- Conclusion
- List of literature used
- Appendices, if any
- Affidavit
Header image: © monticellllo, stock.adobe.com

How to use the Google Authenticator on Windows
How to use the Google Authenticator on Windows
Google Authenticator is a fine thing. The app makes surfing the net much safer. Above all, it prevents unauthorised persons from accessing pages that are doubly secured with the so-called 2FA method. The problem is: the app is actually only available for iOS and Android devices. Double authentication via the PC is therefore not possible. Or is it? We show you how to set up the Microsoft Authenticator to be on the safe side from the computer as well.
This is two-factor authentication
It is becoming common practice for more and more online service providers to require users to identify themselves in addition to their password in order to log in to their account. Authentication is usually done by entering a password. But instead of being able to access the page, the user must first identify himself with another code, which he can query on his installed Google Authenticator, for example, and which is only valid for a few minutes.
Google Authenticator or Microsoft Authenticator?
Although Google Authenticator works equally well for iOS and Android, Microsoft Authenticator is the better choice for some. Especially if Microsoft Office, Microsoft Office 365 Pro Plus, Windows 10 or Windows 10 Pro are to be equipped with this security tool.
Google Authenticator
It is one of the most popular authentication apps. Many iOs and Android users are particularly fond of its ease of use. To add a new account to the app, simply photograph the QR code. This also works while the app is still open. Disadvantages: Unfortunately, the software cannot be locked (for example, via a PIN or fingerprint). So if someone manages to unlock the smartphone, they have access to all the codes stored in the app. Synchronising the 2FA codes between two devices does not work either. With a new smartphone, all accounts must therefore be added again.
Microsoft Authenticator App
The Microsoft Authenticator app, which is also free, also works on iOS and Android. However, it has the advantage that it can be easily integrated into other Microsoft accounts. Several devices can be set up with the Microsoft Authenticator App. The authentication codes are encrypted and synchronised via the cloud. Another plus: All added accounts are automatically backed up, so that switching to a new device goes smoothly. So anyone who works daily with Windows 10 will have an easier time with the Microsoft Authenticator.
How to use Google Authenticator on Windows too
With the Microsoft programs Microsoft Office, Microsoft Office 365 Pro Plus, Windows 10 or Windows 10 Pro you can use the Google Authenticator if you don’t want to activate your mobile phone or set up the Microsoft Authenticator every time for two-factor authentication. The prerequisite for this is, however, that the secret key is available, which is provided by the respective online provider during the initial setup. Attention: The Google Authenticator is not offered as a separate tool for Windows! In order to use the security tool, the algorithm with which the security codes are created must first be found. The open source app WinAuth knows this algorithm and generates the same codes as on a smartphone after entering the secret key. This is how you proceed if you want to set up Google Authenticator or Microsoft Authenticator for Microsoft Office, Microsoft Office 365 Pro Plus, Windows 10 or Windows 10 Pro:
- Download the current version of WinAuth.
- Unzip and start, then click „add“ to add a new provider.
- Select Google as the first provider to find the algorithm.
- Enter the name of the provider and select the icon.
- Then enter the secret key in the middle field.
- Under „Verify Authenticator“ a code appears to log in to the corresponding provider.
- click „OK“ and set up further providers.
- A new 2FA code is generated simply by clicking on the update code next to the provider name.
Header image: © Proxima Studio, stock.adobe.com
Test Windows 11 in the browser
Test Windows 11 in the browser
In the Windows Insider Programme, Microsoft’s new operating system can already be tested in the browser, although it is not yet officially on the market. Of course, that’s tempting. But it takes a lot of effort to get into the Insider Programme. But give up because of that? Never give up! We reveal the tricks with which you can also test the system with a Windows 11 download!
This is Windows 11
Until a while ago, Microsoft announced that there would be no true Windows 10 successor, only updates. Now, however, Windows 11 is coming onto the market, in all likelihood at the end of 2021 – and users are eager to see what news it has in store! A few things have already become known. For example, instead of the large Windows logo on the desktop, a standard wallpaper now appears as the background. Some applications and features are also new. The floating taskbar, for example, rounded corners on the icons, animated command executions in the Info Centre, and much more. The operating system is supposed to be significantly faster than its predecessor Windows 10, run stably and make working on the PC easier. In addition, the often unloved tiles have been reduced to a minimum and can even be removed completely. All in all, the Windows 10 successor is probably a successful coup by Microsoft – even if there seem to be a few disadvantages. There are reportedly problems with Windows Explorer, and the hardware requirements are quite demanding. Those who still have an older PC should think about buying a new one now.
How to test Windows 11 in the browser?
Officially, there is only a pre-release version that can be tested via the Windows Insider Programme. Annoying – if it weren’t for a clever developer who has made the Windows 11 interface available for testing in the browser on the basis of the JavaScript library React. It is true that the complete Windows 11 cannot be tried out here. But some functions can be controlled so that you can get a first impression of the new operating system. On GitHub you can already see the user interface of the Windows 10 successor. Some pictures in the gallery below show what is possible with Windows 11 and how the fresh design comes across. Clicking on one of the pictures opens a new tab with the picture in large format. And this is exactly where you can download the whole thing to test one or the other Windows 11 function. For example, you can try out the Start menu and the search function. You can also access the Store with a mouse click, and even Edge already works in the pre-release version. A little treat: as with the „real“ version, the widgets can also be moved to the left on the desktop. Of course, not everything works yet. The new settings are not yet activated, nor is Windows Explorer. And the Info Centre still appears in the old style.
Download in the Windows Insider Programme
If you want to test the real beta version, you can start the Windows 11 download as an Insider. The individual steps to do this:
- Register at insider.windows.com.
- Log in with your existing Microsoft account or open a new account.
- Check the box to agree to the terms of use.
- On the next page, click on the field „Start flighting“.
- In the Windows 10 settings, go to „Update and security“.
- Click on „Windows Insider Programme“ at the bottom left.
- Select the plus symbol to link the Windows Insider account with Windows 10.
- Select the corresponding e-mail address and click „Next“.
- Click on the grey field under „Select your insider settings“.
- Now select „Dev Channel“ in the window to go to the beta version of Windows 11.
- Next, go to Windows Update and select „Check for updates“.
- The Windows 11 preview can now be downloaded and installed.
Header image: © Ascannio, stock.adobe.com

Windows 10: How the Power Shell works
Windows 10: How the Power Shell works
Actually, the Power Shell in Windows 10 or Windows 10 Pro is such an ingenious tool that everyone should use it. But many users who buy Microsoft Office think it’s only for professionals. Far from it! Because with the Power Shell, any number of tasks can be done on the computer with just a few entries. Instead of making endless clicks through submenus and system settings, the Power Shell is all you need. We explain here exactly how to work with it and what advantages this tool brings.
This is the Power Shell in Windows 10
On Windows 10 and Windows 10 Pro the commands for the computer can be entered in two ways: Firstly, with the classic command prompt or cmd.exe. And secondly with the Power Shell programme. This allows commands to be executed in a short way, which – if possible at all in Windows 10 – are extremely complicated via mouse click and the settings. This means that the command prompt with PowerShell is much easier, less time-consuming and makes working on the computer more effective. At its core, PowerShell is an up-to-date version of the familiar command prompt. All the „old“ commands work one way or the other, but Power Shell adds some new functions that are denied to users of the old command prompt. As an example, only If commands are mentioned here. After the Buying Microsoft Office one way to recognise working with PowerShell is that the display uses a blue background with white lettering. Tip: If one enters the command „cmd“ or „cmd.exe“ in the Power Shell, the commands can be entered as in the usual command prompt.
Start Power Shell via command prompt
In order to be able to execute the Power Shell commands under Windows 10, it must of course first be started . After the command prompt (key combination) „WINDOWS + R“, the command „PowerShell“ is typed in. Alternatively, the PowerShell can also be called up via the Start menu.
Run Power Shell as administrator
The start menu also allows you to start the programme as an administrator and execute commands. The advantage of this is that more commands can be executed than with the simple command prompt.
- To do this, type „PowerShell“ in the start menu, then click on the corresponding entry.
- Click on PowerShell with the right mouse button and select „Run as administrator“.
Now all functions of the PowerShell input console can be used.
These are the advantages of using the Power Shell with Windows 10
One of the biggest advantages is that commands no longer have to be laboriously entered via the command prompt or cmd.exe, but can be written directly into an input window . In addition, useful functions can be called up with a simple command. These include, for example, analysing the processor load, restoring a defective start button, reading out the Windows serial number or even uninstalling apps. The most useful functions and commands are:
- get-command + Enter: This basic command shows an overview of all commands.
- F7 key: In older Windows 10 versions, this displays the last lines entered.
- clear + Enter: The current command line is displayed, while the last lines entered are hidden.
- && + Enter: The combination is used to enter several commands at the same time. These are separated from each other with the double ampersand (without spaces).
- Charmap + Enter: This displays the Windows character table, which lists special characters that are not directly available on the keyboard.
- dir (filename) + Enter: This command can be used to search for files in the system even if you do not know the full name of the file. Instead of the unknown letters, simply type the asterisk symbol * and Power Shell will automatically search for files that match the incomplete file name.
- dir /?: A short command that explains the details of the dir functions.
PowerShell also offers the possibility to open file paths directly in the programme. This means that the path is dragged from the header in Explorer into PowerShell, eliminating the need for further typed input.
Header Image: © Mirsad, stock.adobe.com

What the Windows 11 operating system brings
This is what the Windows 11 operating system brings
Actually, Windows 10 was supposed to be the last operating system Microsoft was going to launch. Instead of a real Windows 10 successor, there were only to be updates, according to the company. But now everything has turned out quite differently. With the new Windows 11, Microsoft wants to erase all the errors and unpopularities of some of the predecessor systems and at the same time combine all the advantages from Windows 7 to Windows 10 in a compact way. Has it succeeded? We put the strengths and weaknesses through their paces!
What's new about the Windows 10 successor?
Windows 7 was one of the most popular operating systems. Its successor Windows 8, on the other hand, left some users in sheer despair. Above all, the Start menu with its dominant, screen-filling tiles was considered annoying by most. With the Windows 10 upgrade, the tiles were still there. But firstly, they were not as big, and secondly, the „small tiles“ could be removed with a few clicks in the context menu commands. Windows 11, on the other hand, now comes with a completely new user interface – without any tiles at all. The start menu floats above the taskbar and can also be placed in the middle of the desktop. Frequently used programmes, recently used files and system controls are clearly arranged in the upper area of the Start menu. Windows 11 does without the pre-installed Skype altogether; Microsoft Teams is favoured instead. The icons for programmes or the Start button can be placed on the user interface either in the middle of the taskbar or left-aligned – just as you prefer. Dark and light modes are still available for the screen. The distinctive Windows logo in the middle is now missing. Instead, Windows 11 comes with a new standard wallpaper. The widgets from Windows Vista are also new or revived. Here you can choose to have news from all over the world, exotic food trends or the current weather displayed as information snippets or in full-screen view. And: The widgets are open to developers, so that any programme can be integrated relatively easily.
Strengths and weaknesses of Windows 11
The new operating system is clearly more than a simple Windows 10 upgrade. But like everything new, the Windows 10 successor has its strengths and weaknesses. Where exactly the strengths and weaknesses lie:
Windows 11 plus points
- Up-to-dateness: The operating system runs stably and noticeably faster than its predecessor. Both the task manager and the virus protection are state-of-the-art. Quick start mode, Explorer copy dialogue and engine as well as Windows X menu are practical tools.
- Design: The centrally placed icons with rounded corners in the taskbar look modern. Unnecessary apps have disappeared from the user interface, the standard wallpaper as background gives a refreshing new image.
- Freedom of choice: Some users may not like some of the visual innovations. No problem – almost everything can be deactivated and/or displayed and arranged as usual, as with older operating systems.
- Speed: As already mentioned, Windows 11 is considerably faster than its predecessor. And this applies to the overall performance. Both programmes and applications such as YouTube or extensive websites can be opened and consumed smoothly. A new function also contributes to the speed: A warning is issued against programmes that start unnoticed in the background. They can then be deactivated by clicking on an automatic pop-up window and in the settings.
- Window arrangement: As with Windows 7 and Windows 10 Upgrade from 2009 and 2015, windows can be dragged to the edge of the screen using „Aero Snap“ and fixed there with 50 percent screen size. With „Snap Assist“, other open windows can also be displayed in a large preview for the other 50 per cent of the screen. In addition, the windows can be scaled to 25 percent of the screen and dragged into a corner. By mouse-over over one of the windows, the programme displays useful options for the arrangement.
- Animation: Arrangements with the operating system are animated and can be called up by key combinations:
- Windows + D minimises all windows.
- Windows + E opens Edge.
- Windows + R activates a futuristic fly-in effect to open the Run dialogue.
- Windows + X makes the context menu of a button pop up.
- Context menus: With keyboard shortcuts or a right mouse click, the context menu appears in a free space on the desktop. New are the large buttons and the icons that can be cut, copied, renamed, shared or deleted. The context menu command „Copy as path“ is practical and can be used to quickly click to preferred pages. The option „Show more options“ in all context menus can be used to call up the classic context menu.
- Edge: Internet Explorer can still be found in the Program Files. However, Chromium Edge, the highest-quality browser to date, is activated.
- Boot sound: Users of Windows 7 still know it: the melody that sounds when logging into a user account. With the new operating system, this boot sound is back – but a little more restrained and backgrounded.
- Windows Terminal: This tool combines three important functions: the command line, PowerShell and the Azure Cloud Shell. Ideal for executing quick commands in alternation.
- Costs: Windows 11 is free for Windows 10 users.
Windows 11 disadvantages
- Positioning: Unfortunately, the taskbar cannot be positioned arbitrarily. Only the bottom edge of the screen is available.
- Hardware requirements: If you want to work with Windows 11, you need a newer PC model. The hardware should in any case meet the following requirements:
- CPU with dual-core model, at least 1 gigahertz
- 4 gigabytes of RAM
- 64 gigabytes of available (SSD) storage space
- DirectX 12 supporting graphics card
- WDDM 2.0 driver
- UEFI mode for booting
- Monitor with HD-ready 720p resolution
- TPM-2 chip (Trusted Platform Module)
- only the latest processors as command receivers
- Online account: Those who want to install Windows 11 on their PC must first create an online user account.
Tip: In initial tests, certain keywords have so far made it possible to use the system without an online account by means of a trick. To log in, enter words such as „spammer“, „scammer“, „billgates“ or „elonmusk“. When prompted for a password, anything can then be entered. A problem message will appear that an incorrect password has been entered too often. Then an input field appears for the account name of a local account with which the existing account can be accessed.
- Ribbons: The conspicuously wide control elements have disappeared from the file manager in Windows 11.
- Data backup: Not much has changed here. The imager from Windows 7 is still built in for backing up the operating system. In the past – especially under Windows 10 – the backup often led to problems.
- Animations: Some think it’s great – others are annoyed by menus that open animated with special effects. Being able to activate or deactivate them separately does not seem to be provided for.
- Duplicate programmes: With Windows 11, you can use two pre-installed apps for listening at once: „Groove Music“ and Windows Media Player (WMP) 12. Both programmes provide roughly the same functions, but take up unnecessary memory.
- DVD playback: Since Windows 8, the MPEG-2 codec has disappeared – and has still not reappeared in Windows 11. It’s a pity, because it doesn’t allow DVD playback.
- Boot sound: OK, above the starter melody was still considered a plus point. At the same time, however, the sound can get on your nerves after a while. The good thing, however, is that it can be deactivated in the system control with the search word „sound“ and the command „Change system sounds“.
- Explorer: As described above, Internet Explorer still exists in the system. However, if you want to use it, Edge opens automatically. The problem: If the Microsoft browser is damaged, Explorer cannot be opened as an alternative.
- Desktop wallpapers: Fans of wallpapers as desktop backgrounds were still happy about the possibility to change the motif cyclically under Windows 7. Windows 11 hardly offers this option any more. As with Windows 10, only 6 swap cycles are possible.
Header image: © Rawf8, stock.adobe.com
Start menu Windows 10: How to activate it in Windows 11 as well
Start menu Windows 10: How to activate it in Windows 11 as well
Instead of Windows 10X as the successor to the popular Windows 10 Pro microsoft has come up with something completely new: Windows 11 with new features and, above all, a completely revamped design. But it is precisely this that is already meeting with little approval from some users. Those who are used to the Windows 10 start menu will find the changeover to the Windows 10 successor difficult. But with a few tricks, you can work with the Windows 11 beta version as usual.
This is different from Windows 10 Pro
As early as the end of June 2021, users could download the test builds of Windows 11 via the Windows Insider Programme (the final version is expected to be available by the end of 2021). And anyone who has tried out Windows 11 Beta will quickly realise that many an element has been taken over from Windows 10X. Particularly striking is the start of the Operating system. Unlike the Windows 10 start menu, it floats slightly above the taskbar in the 11 version and can also be placed in the middle of the desktop. The live tiles, which had caused some annoyance, have disappeared. In their place, you will now find the pinned programmes in the upper area of the screen, and the most recently used ones just below them. The controls are also placed there – and everything has elegant rounded corners. Microsoft has retained the light and dark modes in the latest version – but without the conspicuous Windows logo. Another innovation is actually old hat – but a popular one! Because with Windows 11, the widgets return. The small snippets of information with the latest news, weather forecast or share prices are still familiar to users from Windows Vista. Tip: Computers running the current Windows 10 version can be updated to Windows 11 free of charge. The prerequisite for this, however, is that the hardware is suitably fit.
Requirements:
- Dual-core CPU (1GHz) with 64-bit support
- 4 GByte RAM
- 64 GByte memory
- UEFI firmware
- Secure Boot with TPM 2.0
- DirectX 12 compatible graphics card
- Display with at least 720p resolution
If you prefer to return to the Windows 10 start menu: This is how to do it
Microsoft obviously shows understanding for the habits of its loyal fans. That’s why Windows 11 includes an option that allows users to return to their beloved Windows 10 start menu in the blink of an eye. However, the programmers have hidden this option a little. But searching is supposed to be fun, as they say.
These are the steps to return to the Windows 10 Start menu:
- First, right-click on an empty space on the Taskbar on the taskbar.
- Then "Taskbar settings activate.
- If not set automatically, now in the left-hand bar "Personalisation in the left-hand bar.
- Now in the window "Taskbar behaviours or "Taskbar behaviours".
- Select the word " left " with the function " Taskbar alignment". This puts the start button, the fold-out start menu and other icons back in the usual place.
Those who like them can also bring back the tiles
Windows 10 Pro has caused a huge amount of displeasure among some users. The reason for the anger were the tiles that housed the apps in the Windows 10 Start menu. Some, however, found this to be more elegant and clear than the old design. Windows 11 does without the „tiling“. However, those who love them can also activate the design with a few steps and a few clicks:
- Open the registry editor with the search term "regedit".
- Now enter the command "ComputerHKEY_CURRENT_USERSoftwareMicrosoftWindowsCurrentVersionExplorerAdvanced" in the navigation bar.
- Now select "Advanced" in the sidebar with a right mouse click.
- A context menu appears in which "New - DWORD value (32-bit)" is selected.
- This new DWORD value is named "Start_ShowClassicMode".
- Double-click to open this new value, now enter a 1 under the password "Value" and save with "OK".
- To return to the tile start menu, you now only have to restart the computer.
Header Image: © monticellllo, stock.adobe.com
PowerPoint presentation: How to create a timeline
PowerPoint presentation: How to create a timeline
For years, a good PowerPoint presentation has made the explaining world at schools and universities, in evening classes and at business meetings easier, more colourful, more beautiful. What some don’t know: With Microsoft PowerPoint can also be used to create an excellent timeline, for example, to visualise a chronological sequence of events in such a way that it „sticks“. We show here how to incorporate the timeline in a PowerPoint design and even make it more concise with effects.
Does a timeline make PowerPoint more vivid? YES!
While it’s a little tricky to use with, for example Microsoft PowerPoint 2016 to insert a descriptive timeline into the PowerPoint design – but the PowerPoint presentation wins! It turns simple PowerPoint templates into a PowerPoint presentation that concisely shows what happened when and in what order. From birth to school enrolment to wedding and all the way to the adventure trip in South America. Of course, the timeline in a PowerPoint presentation is also invaluable in business. For example, if you want to clearly show when a certain business branch started, when the first highlight took place and when the sales figures went up. Here we show step by step how the timeline enhances PowerPoint.
1: Set timeline with Microsoft PowerPoint
- With the drawing function "Line" from the corresponding box in the menu bar, you first define the time axis. Created with the shift key held down, the line remains exactly horizontal.
- In the menu "Draw" menu you can still design the axis. For example, as a coloured line, dotted or in a stronger image.
- If you click on the line with the right mouse button, you can use the function "Set as standard line function. This will format all other lines in the PowerPoint template accordingly.
- At the beginning of the timeline, you now define a much shorter vertical starting line and a first marking line - again by holding down the Shift key.
2: No timeline without a peak
- Again from the box in the menu bar, first select the block arrow. Click on it with the right mouse button, then "edit points select.
- Right-click on the lower left point of the block arrow and select "Open path" "Open path select. Delete the two points at the bottom left and the one at the top left. What remains is a simple triangle.
- The same formatting as the time axis is obtained by activating the time axis with a click. Then with the key combination "Control + Shift + C" copy.
- Next, click on the triangle and select the key combination " Control + Shift + V". This makes the filling of the shape disappear, the remaining lines are formatted in the same way as the time axis and the marking lines.
3: Place timeline in PowerPoint design
- All previous strokes including the tip are now roughly positioned at the right place in the PowerPoint presentation.
- To fine-tune the elements in the "Start" tab "Arrange - Align - Centre vertically" select.
- Now mark the start line and the time axis and "Arrange - Align - Left-aligned" select.
- For the correct positioning of the tip, select "Arrange - Align - Right-aligned" .
4: The events on the timeline of the PowerPoint presentation
- Now, of course, the "highlights" should also be visible on the timeline of the PowerPoint presentation according to their occurrence.
- To do this, first create two text boxes. The first one marks the time of the event, the second one is needed for the actual text.
- The text box for the time is now positioned roughly above the first marking line, the second below it.
- Now mark both text boxes as well as the vertical line "Arrange - Align - Centre horizontally" select.
- In the next step, group the three elements with "Arrange - Group" so that all elements can be copied at the same time or moved by drag and drop.
- With the commands "Control + C" or "Control + V all elements can now be copied and pasted in any number at the desired position.
- Before you fill the individual event boxes with text, select all the elements and choose "Arrange - Align - Distribute horizontally" so that all events are displayed at the same distance from each other.
Header Image: © Aleksei, stock.adobe.com
Important information about Windows 11
A new Windows experience that brings you closer to the people and things you care about.
Publication
Microsoft Windows 11 will be the successor to Windows 10 and was announced by Microsoft product manager Panos Panay on 24 June 2021. According to the June 2021 announcement, the new operating system will be released at the end of 2021. What is the difference between Windows 10 and Windows 11? Windows 11 offers all the power and security of Windows 10 with a redesigned and updated look. It also includes new tools, sounds and apps. Every detail is taken care of. It all adds up to a refreshing experience on your PC. When can I buy a PC with Windows 11 pre-installed? PCs with Windows 11 pre-installed will be available later this year. What does a PC with Windows 11 cost? It depends. Many different manufacturing companies will offer a variety of devices running Windows 11, all at different price points. Where can I buy a PC with Windows 11? PCs pre-installed with Windows 11 will be available from a variety of retailers later this year. Details will follow.
Will my accessories work with Windows 11? If your accessory runs on Windows 10 and meets the requirements of Windows 11, it should run on Windows 11. If you want to be sure, please contact the manufacturer of your accessory. I want to buy a PC now. Can I install Windows 11 later? Most Windows 10 PCs currently sold can be upgraded to Windows 11. In order for the PC to be upgraded to Windows 11, it must meet the minimum hardware requirements and some features require specific hardware. The timeline for the rollout of the update is being finalised and is expected to begin in late 2021 and continue through 2022. The specific time frame varies depending on the device. How do I know if a new Windows 10 PC meets the minimum requirements? There are a few ways to find out. If you’re in the process of shopping for a new PC, look for the „Free Upgrade to Windows 11“ notice on the fact label. You can also ask your dealer for confirmation. When can I upgrade to Windows 11 on my Windows 10 device? If your existing Windows 10 PC is running the latest version of Windows 10 and meets the minimum hardware requirements, you can upgrade to Windows 11. The release schedule for the upgrade is still being determined, but for most devices already in use today, it is expected to be ready in early 2022. Not all Windows 10 PCs that are eligible for an upgrade to Windows 11 can be upgraded at the same time. To determine if your PC is eligible for an upgrade, download and run the PC Integrity Check app. Once the update rollout has started, you can check if the update is ready for your device under Settings > Windows Update. What if my PC does not meet the minimum hardware specifications? Can I stay with Windows 10? Yes. Windows 10 continues to be a great version of Windows. We are committed to supporting Windows 10 until 14 October 2025.
How do I know when the upgrade is available for my Windows 10 PC? Updates for Windows 11 will begin in late 2021 and continue through 2022. During this time, we will be doing some behind-the-scenes testing and validation for your specific PC. Windows Update will indicate if and when your PC is eligible. You can check this by going to „Settings“ > „Windows Update“. How much does it cost to upgrade from Windows 10 to Windows 11? It is free of charge. However, only Windows 10 PCs that are running the latest version of Windows 10 and meet the minimum hardware requirements can be upgraded. You can check whether you have the latest updates for Windows 10 under „Settings“ > „Windows Update“. What is the difference between upgrade and update? An update can consist of bug fixes, security fixes and new features in a version of Windows. Updates are usually made during the course of the year. An upgrade takes place when you change versions, for example from Windows 10 to Windows 11 or editions from Windows Home to Windows Pro. How long is the free upgrade available? The free upgrade offer has no specific end date for eligible systems. However, Microsoft reserves the right to end support for the free offer. This end date will be no earlier than one year after general availability. Can I continue to use Windows 10? Yes. There is no need to upgrade to Windows 11. We will continue to support Windows 10 until 14 October 2025.
Does Windows 11 take up more space on my PC than Windows 10? Windows 11 and Windows 10 require approximately the same amount of storage space. However, additional storage space is required during the upgrade process. Windows deletes this extra space about 10 days after the upgrade is complete. Is Windows 11 a replacement for Windows 10? Windows 11 is the latest version of Windows. However, we will continue to support Windows 10 until October 2025. What happens to my files when I upgrade to Windows 11? By default, all your files and data will be transferred. However, we recommend that you back up your files before installation. Can I return to Windows 10 after the upgrade if I don’t like Windows 11? Yes. After installing the Windows 11 update, there is a 10-day period during which you can return to Windows 10, keeping the files and data you brought with you. At the end of the 10 days, you will need to back up your data and perform a „reinstall“ to return to Windows 10. How long does the installation of Windows 11 take? Downloading and installing Windows 11 will most likely take longer than a typical Windows 10 feature update. You can use your PC while downloading Windows 11 and then have the option to schedule the installation to take place at a time when you do not want to use your PC. Can I upgrade my Windows 10 PC to Windows 11 when I run S Mode? If your PC meets the minimum hardware specifications, Windows 10 Home Edition in S mode can be upgraded to Windows 11 Home Edition in S mode. If your Windows 10 PC is running Pro Edition in S mode, you must exit S mode to upgrade to Windows 11 Pro. Windows 11 Pro Edition is not available in S mode. Can a really old PC run Windows 11? You can use the PC Integrity Check app to see if your machine is ready to upgrade to Windows 11. Many PCs that are less than four years old can be upgraded to Windows 11. They must be running the latest version of Windows 10 and meet the minimum hardware requirements.
Important note
Windows 10 and Windows 11 will continue to run in parallel. Windows 10 will be supported until October 2025. This is probably also because Windows 11 increases the hardware requirements. If your system is not ready for Windows 11, you still have a few years. Even if you don’t like the look of Windows 11, you can just stick with Windows 10. It’s still unclear whether Microsoft will continue to release two feature updates a year for Windows 10. Either way, Windows 10 21H2 should be available in autumn, and of course there will be a security update every day.
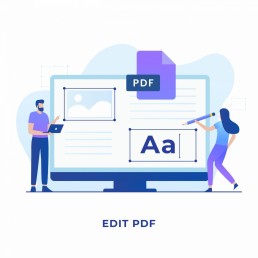
PDF Password: How to remove it
PDF password: How to remove it
Some PDFs are already protected with a password by the sender. If you do not know this password, you cannot read the document. But every now and then you also want to protect sensitive documents that you send in PDF format with a password so that they are safe from unauthorised access. Good PDF converters make this step easy. But how can you remove the PDF password once it has been set? We show it step by step.
How to remove the PDF password in Windows
By its very nature, a file that is password protected can only be opened if the password is known. And only then can the protection be removed, for example to print the document or make changes to it.
Here's how it works:
- Open PDF file
- Enter password
- Click on the "Print" option and select "Print to PDF"
- Windows 10 offers the option directly with the command "Microsoft Print to PDF"
- Confirm
- Select the destination folder for the file
- "Click "Save
This automatically creates a copy of the file, which you can save without password protection.
The steps for Mac users
Via the browser, removing the PDF password also works with the „Print to PDF“ command, just like on Windows computers:
- Open PDF
- Enter password
- "Select "Print
- Select "Save as PDF" from the drop-down menu in the bottom left-hand corner
- Select destination
- Confirm
An even easier alternative is to open the encrypted PDF with „Preview“. After entering the password, select „File“ in the menu bar, then click on „Export as PDF“ in the submenu. Search for a storage location, confirm – done!
Can the PDF password also be removed on the smartphone?
Sure, mobile phones also offer possibilities in this regard. However, a distinction must be made between Android and iOS (iPhone):
Android:
- First, install an appropriate app such as Google PDF Viewer or PDF Utilities.
- Enter the PDF and decrypt it with a password.
- Then create an unencrypted copy with "Print to PDF" as described above.
iOS:
- Open PDF
- Select "Share" icon
- Tap the "Print" function
- In the print preview, tap the "Share" icon again
- Select the target volume for the copy
- Confirm
Use PDF software
In order to be able to create a PDF at all, you first need a PDF converter. With such a PDF software, you can not only add a PDF password to documents, but also easily remove it again. Adobe Acrobat 2020 is at the top of the class here, allowing MIP-protected files to be opened under Windows and Mac. After the security systems AIP (Azure Information Protection) and Information Protection for Office 365, MIP (Microsoft Information Protection) is considered absolutely secure protection for sensitive documents and data in PDF format. Adobe Acrobat 2020 (as well as Acrobat Reader 2020) automatically detects if a file is MIP-protected. Users are then automatically prompted to download and install a plug-in from the Adobe help page. This then allows corresponding files that are protected with a PDF password to be opened without any problems.
For Adobe Acrobat DC users
Many users also use the PDF software Adobe Acrobat DC. With this, it is possible to remove the PDF password in just three steps:
- Open PDF file
- In the security settings, select "Tools", then in the submenu select "Protect", "More options" and "Remove security settings".
- Depending on the type of protection, you can now remove the password with a simple click on "OK". Or a prompt appears to enter the password, which one must confirm twice with "OK".
Online tools for removing the PDF password
Those who do not want to or cannot carry out the steps described above also have the option of reading and editing password-protected documents online . Online PDF softwares such as PDF24 or PDFCreator allow you to copy the protected document to the website. Then all that needs to be done is to enter the password, and seconds later a copy of the document is created without password protection.
Header Image: © Hengki, stock.adobe.com

Kaspersky Virus Protection: How to enter the activation code
Kaspersky antivirus: How to enter the activation code
The horror scenario for every computer user: You turn on your PC in the morning and nothing happens! Or – even worse – a message appears saying that the computer has been hacked and that you can only get your data back by paying a ransom. These are only two of the countless possibilities that Trojan viruses and other malware can trigger. Kaspersky virus protection, which surrounds the computer like the walls of a medieval castle, can help.
What is Kaspersky virus protection?
Basically, every computer has vulnerabilities through which hackers can introduce their viruses. Just being connected to the Internet can be a vulnerability without adequate protection. But even malware that is either loaded via the network or fed onto the hard disk via data carriers can destroy all data at once or render parts of the computer unusable. For this reason, it is imperative that every PC user has up-to-date software for Virus protection software installed. Kaspersky virus protection has proven to be the leading programme in this area. The software successfully fends off attacks by viruses, malware and Internet dangers such as dangerous websites and phishing attempts.
This is what the software contains:
- Virus protection: In addition to a virus scanner, the programme also offers real-time protection that detects and removes viruses and Trojans before they can penetrate the computer's system.
- Firewall: The firewall included in the version Kaspersky Total Security 2021 version analyses data traffic and protects IT systems securely against attacks or unauthorised access
- VPN: Kaspersky Total Security 2021 also includes a VPN that allows you to surf the internet anonymously, for example for protection when using an unsecured network.
- Special features: The virus protection programme from Kaspersky also scores with extras such as parental control, vulnerability scanner, spam filter, update assistant, game mode, filter for search results, protection for online banking, password manager and a filter for advertising.
Virus protection with Kaspersky requires an activation code
In order to use Kaspersky’s virus protection, you must first enter a 20-digit activation code. Two methods are available for this:
Enter activation code during installation
- The first thing to do is to check that the PC has the correct date. Only then should you enter the code in the window that opens during the installation.
- After entering the code in the corresponding fields, click on the button "Activate".
- If a message appears stating that the software has been successfully activated, click the "Finish" button.
- The Kaspersky Anti-Virus Licensing window appears. Details on the activation of the software are displayed here, which you can follow step by step.
Activation after installation
- The first step is to launch the Kaspersky Anti-Virus application.
- Then select the option "Enter activation code" in the lower right area.
- The "Licence management" window appears, here you must select the "Activate programme" item.
- The Kaspersky Anti-Virus activation window opens. To activate, proceed as described above.
Avast Premium Security 2020
The second antivirus software we would like to introduce today is Avast Premium Security 2020. The paid version includes all the features you might already be used to with the free version, plus those of Avast Internet Security. This includes:
- Antispam filter: It detects unwanted emails and denies them access to the mail programme.
- Firewall: With this software, protection can be controlled directly from the user interface.
- Automatic programme updater: which always uses the latest version.
- Real-time protection: With it, one can monitor all activities of the computer such as running programmes and files in real time.
- FileRep and WebRep: These features check files and websites against databases. If something is not trustworthy, the software informs you immediately.
- Virus Container: This is an isolated area on the hard disk where suspicious or dangerous files are safely stored.
Header Image: © Shinonome Production, stock.adobe.com