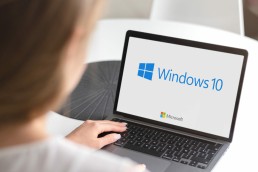
Test Windows 11 in the browser
Test Windows 11 in the browser
In the Windows Insider Programme, Microsoft’s new operating system can already be tested in the browser, although it is not yet officially on the market. Of course, that’s tempting. But it takes a lot of effort to get into the Insider Programme. But give up because of that? Never give up! We reveal the tricks with which you can also test the system with a Windows 11 download!
This is Windows 11
Until a while ago, Microsoft announced that there would be no true Windows 10 successor, only updates. Now, however, Windows 11 is coming onto the market, in all likelihood at the end of 2021 – and users are eager to see what news it has in store! A few things have already become known. For example, instead of the large Windows logo on the desktop, a standard wallpaper now appears as the background. Some applications and features are also new. The floating taskbar, for example, rounded corners on the icons, animated command executions in the Info Centre, and much more. The operating system is supposed to be significantly faster than its predecessor Windows 10, run stably and make working on the PC easier. In addition, the often unloved tiles have been reduced to a minimum and can even be removed completely. All in all, the Windows 10 successor is probably a successful coup by Microsoft – even if there seem to be a few disadvantages. There are reportedly problems with Windows Explorer, and the hardware requirements are quite demanding. Those who still have an older PC should think about buying a new one now.

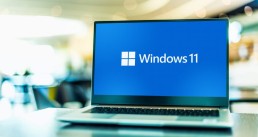
How to test Windows 11 in the browser?
Officially, there is only a pre-release version that can be tested via the Windows Insider Programme. Annoying – if it weren’t for a clever developer who has made the Windows 11 interface available for testing in the browser on the basis of the JavaScript library React. It is true that the complete Windows 11 cannot be tried out here. But some functions can be controlled so that you can get a first impression of the new operating system. On GitHub you can already see the user interface of the Windows 10 successor. Some pictures in the gallery below show what is possible with Windows 11 and how the fresh design comes across. Clicking on one of the pictures opens a new tab with the picture in large format. And this is exactly where you can download the whole thing to test one or the other Windows 11 function. For example, you can try out the Start menu and the search function. You can also access the Store with a mouse click, and even Edge already works in the pre-release version. A little treat: as with the „real“ version, the widgets can also be moved to the left on the desktop. Of course, not everything works yet. The new settings are not yet activated, nor is Windows Explorer. And the Info Centre still appears in the old style.
Download in the Windows Insider Programme
If you want to test the real beta version, you can start the Windows 11 download as an Insider. The individual steps to do this:
- Register at insider.windows.com.
- Log in with your existing Microsoft account or open a new account.
- Check the box to agree to the terms of use.
- On the next page, click on the field „Start flighting“.
- In the Windows 10 settings, go to „Update and security“.
- Click on „Windows Insider Programme“ at the bottom left.
- Select the plus symbol to link the Windows Insider account with Windows 10.
- Select the corresponding e-mail address and click „Next“.
- Click on the grey field under „Select your insider settings“.
- Now select „Dev Channel“ in the window to go to the beta version of Windows 11.
- Next, go to Windows Update and select „Check for updates“.
- The Windows 11 preview can now be downloaded and installed.
Header image: © Ascannio, stock.adobe.com

Windows 10: How the Power Shell works
Windows 10: How the Power Shell works
Actually, the Power Shell in Windows 10 or Windows 10 Pro is such an ingenious tool that everyone should use it. But many users who buy Microsoft Office think it’s only for professionals. Far from it! Because with the Power Shell, any number of tasks can be done on the computer with just a few entries. Instead of making endless clicks through submenus and system settings, the Power Shell is all you need. We explain here exactly how to work with it and what advantages this tool brings.
This is the Power Shell in Windows 10
On Windows 10 and Windows 10 Pro the commands for the computer can be entered in two ways: Firstly, with the classic command prompt or cmd.exe. And secondly with the Power Shell programme. This allows commands to be executed in a short way, which – if possible at all in Windows 10 – are extremely complicated via mouse click and the settings. This means that the command prompt with PowerShell is much easier, less time-consuming and makes working on the computer more effective. At its core, PowerShell is an up-to-date version of the familiar command prompt. All the „old“ commands work one way or the other, but Power Shell adds some new functions that are denied to users of the old command prompt. As an example, only If commands are mentioned here. After the Buying Microsoft Office one way to recognise working with PowerShell is that the display uses a blue background with white lettering. Tip: If one enters the command „cmd“ or „cmd.exe“ in the Power Shell, the commands can be entered as in the usual command prompt.
Start Power Shell via command prompt
In order to be able to execute the Power Shell commands under Windows 10, it must of course first be started . After the command prompt (key combination) „WINDOWS + R“, the command „PowerShell“ is typed in. Alternatively, the PowerShell can also be called up via the Start menu.
Run Power Shell as administrator
The start menu also allows you to start the programme as an administrator and execute commands. The advantage of this is that more commands can be executed than with the simple command prompt.
- To do this, type „PowerShell“ in the start menu, then click on the corresponding entry.
- Click on PowerShell with the right mouse button and select „Run as administrator“.
Now all functions of the PowerShell input console can be used.
These are the advantages of using the Power Shell with Windows 10
One of the biggest advantages is that commands no longer have to be laboriously entered via the command prompt or cmd.exe, but can be written directly into an input window . In addition, useful functions can be called up with a simple command. These include, for example, analysing the processor load, restoring a defective start button, reading out the Windows serial number or even uninstalling apps. The most useful functions and commands are:
- get-command + Enter: This basic command shows an overview of all commands.
- F7 key: In older Windows 10 versions, this displays the last lines entered.
- clear + Enter: The current command line is displayed, while the last lines entered are hidden.
- && + Enter: The combination is used to enter several commands at the same time. These are separated from each other with the double ampersand (without spaces).
- Charmap + Enter: This displays the Windows character table, which lists special characters that are not directly available on the keyboard.
- dir (filename) + Enter: This command can be used to search for files in the system even if you do not know the full name of the file. Instead of the unknown letters, simply type the asterisk symbol * and Power Shell will automatically search for files that match the incomplete file name.
- dir /?: A short command that explains the details of the dir functions.
PowerShell also offers the possibility to open file paths directly in the programme. This means that the path is dragged from the header in Explorer into PowerShell, eliminating the need for further typed input.
Header Image: © Mirsad, stock.adobe.com

What the Windows 11 operating system brings
This is what the Windows 11 operating system brings
Actually, Windows 10 was supposed to be the last operating system Microsoft was going to launch. Instead of a real Windows 10 successor, there were only to be updates, according to the company. But now everything has turned out quite differently. With the new Windows 11, Microsoft wants to erase all the errors and unpopularities of some of the predecessor systems and at the same time combine all the advantages from Windows 7 to Windows 10 in a compact way. Has it succeeded? We put the strengths and weaknesses through their paces!
What's new about the Windows 10 successor?
Windows 7 was one of the most popular operating systems. Its successor Windows 8, on the other hand, left some users in sheer despair. Above all, the Start menu with its dominant, screen-filling tiles was considered annoying by most. With the Windows 10 upgrade, the tiles were still there. But firstly, they were not as big, and secondly, the „small tiles“ could be removed with a few clicks in the context menu commands. Windows 11, on the other hand, now comes with a completely new user interface – without any tiles at all. The start menu floats above the taskbar and can also be placed in the middle of the desktop. Frequently used programmes, recently used files and system controls are clearly arranged in the upper area of the Start menu. Windows 11 does without the pre-installed Skype altogether; Microsoft Teams is favoured instead. The icons for programmes or the Start button can be placed on the user interface either in the middle of the taskbar or left-aligned – just as you prefer. Dark and light modes are still available for the screen. The distinctive Windows logo in the middle is now missing. Instead, Windows 11 comes with a new standard wallpaper. The widgets from Windows Vista are also new or revived. Here you can choose to have news from all over the world, exotic food trends or the current weather displayed as information snippets or in full-screen view. And: The widgets are open to developers, so that any programme can be integrated relatively easily.
Strengths and weaknesses of Windows 11
The new operating system is clearly more than a simple Windows 10 upgrade. But like everything new, the Windows 10 successor has its strengths and weaknesses. Where exactly the strengths and weaknesses lie:
Windows 11 plus points
- Up-to-dateness: The operating system runs stably and noticeably faster than its predecessor. Both the task manager and the virus protection are state-of-the-art. Quick start mode, Explorer copy dialogue and engine as well as Windows X menu are practical tools.
- Design: The centrally placed icons with rounded corners in the taskbar look modern. Unnecessary apps have disappeared from the user interface, the standard wallpaper as background gives a refreshing new image.
- Freedom of choice: Some users may not like some of the visual innovations. No problem – almost everything can be deactivated and/or displayed and arranged as usual, as with older operating systems.
- Speed: As already mentioned, Windows 11 is considerably faster than its predecessor. And this applies to the overall performance. Both programmes and applications such as YouTube or extensive websites can be opened and consumed smoothly. A new function also contributes to the speed: A warning is issued against programmes that start unnoticed in the background. They can then be deactivated by clicking on an automatic pop-up window and in the settings.
- Window arrangement: As with Windows 7 and Windows 10 Upgrade from 2009 and 2015, windows can be dragged to the edge of the screen using „Aero Snap“ and fixed there with 50 percent screen size. With „Snap Assist“, other open windows can also be displayed in a large preview for the other 50 per cent of the screen. In addition, the windows can be scaled to 25 percent of the screen and dragged into a corner. By mouse-over over one of the windows, the programme displays useful options for the arrangement.
- Animation: Arrangements with the operating system are animated and can be called up by key combinations:
- Windows + D minimises all windows.
- Windows + E opens Edge.
- Windows + R activates a futuristic fly-in effect to open the Run dialogue.
- Windows + X makes the context menu of a button pop up.
- Context menus: With keyboard shortcuts or a right mouse click, the context menu appears in a free space on the desktop. New are the large buttons and the icons that can be cut, copied, renamed, shared or deleted. The context menu command „Copy as path“ is practical and can be used to quickly click to preferred pages. The option „Show more options“ in all context menus can be used to call up the classic context menu.
- Edge: Internet Explorer can still be found in the Program Files. However, Chromium Edge, the highest-quality browser to date, is activated.
- Boot sound: Users of Windows 7 still know it: the melody that sounds when logging into a user account. With the new operating system, this boot sound is back – but a little more restrained and backgrounded.
- Windows Terminal: This tool combines three important functions: the command line, PowerShell and the Azure Cloud Shell. Ideal for executing quick commands in alternation.
- Costs: Windows 11 is free for Windows 10 users.
Windows 11 disadvantages
- Positioning: Unfortunately, the taskbar cannot be positioned arbitrarily. Only the bottom edge of the screen is available.
- Hardware requirements: If you want to work with Windows 11, you need a newer PC model. The hardware should in any case meet the following requirements:
- CPU with dual-core model, at least 1 gigahertz
- 4 gigabytes of RAM
- 64 gigabytes of available (SSD) storage space
- DirectX 12 supporting graphics card
- WDDM 2.0 driver
- UEFI mode for booting
- Monitor with HD-ready 720p resolution
- TPM-2 chip (Trusted Platform Module)
- only the latest processors as command receivers
- Online account: Those who want to install Windows 11 on their PC must first create an online user account.
Tip: In initial tests, certain keywords have so far made it possible to use the system without an online account by means of a trick. To log in, enter words such as „spammer“, „scammer“, „billgates“ or „elonmusk“. When prompted for a password, anything can then be entered. A problem message will appear that an incorrect password has been entered too often. Then an input field appears for the account name of a local account with which the existing account can be accessed.
- Ribbons: The conspicuously wide control elements have disappeared from the file manager in Windows 11.
- Data backup: Not much has changed here. The imager from Windows 7 is still built in for backing up the operating system. In the past – especially under Windows 10 – the backup often led to problems.
- Animations: Some think it’s great – others are annoyed by menus that open animated with special effects. Being able to activate or deactivate them separately does not seem to be provided for.
- Duplicate programmes: With Windows 11, you can use two pre-installed apps for listening at once: „Groove Music“ and Windows Media Player (WMP) 12. Both programmes provide roughly the same functions, but take up unnecessary memory.
- DVD playback: Since Windows 8, the MPEG-2 codec has disappeared – and has still not reappeared in Windows 11. It’s a pity, because it doesn’t allow DVD playback.
- Boot sound: OK, above the starter melody was still considered a plus point. At the same time, however, the sound can get on your nerves after a while. The good thing, however, is that it can be deactivated in the system control with the search word „sound“ and the command „Change system sounds“.
- Explorer: As described above, Internet Explorer still exists in the system. However, if you want to use it, Edge opens automatically. The problem: If the Microsoft browser is damaged, Explorer cannot be opened as an alternative.
- Desktop wallpapers: Fans of wallpapers as desktop backgrounds were still happy about the possibility to change the motif cyclically under Windows 7. Windows 11 hardly offers this option any more. As with Windows 10, only 6 swap cycles are possible.
Header image: © Rawf8, stock.adobe.com
Start menu Windows 10: How to activate it in Windows 11 as well
Start menu Windows 10: How to activate it in Windows 11 as well
Instead of Windows 10X as the successor to the popular Windows 10 Pro microsoft has come up with something completely new: Windows 11 with new features and, above all, a completely revamped design. But it is precisely this that is already meeting with little approval from some users. Those who are used to the Windows 10 start menu will find the changeover to the Windows 10 successor difficult. But with a few tricks, you can work with the Windows 11 beta version as usual.
This is different from Windows 10 Pro
As early as the end of June 2021, users could download the test builds of Windows 11 via the Windows Insider Programme (the final version is expected to be available by the end of 2021). And anyone who has tried out Windows 11 Beta will quickly realise that many an element has been taken over from Windows 10X. Particularly striking is the start of the Operating system. Unlike the Windows 10 start menu, it floats slightly above the taskbar in the 11 version and can also be placed in the middle of the desktop. The live tiles, which had caused some annoyance, have disappeared. In their place, you will now find the pinned programmes in the upper area of the screen, and the most recently used ones just below them. The controls are also placed there – and everything has elegant rounded corners. Microsoft has retained the light and dark modes in the latest version – but without the conspicuous Windows logo. Another innovation is actually old hat – but a popular one! Because with Windows 11, the widgets return. The small snippets of information with the latest news, weather forecast or share prices are still familiar to users from Windows Vista. Tip: Computers running the current Windows 10 version can be updated to Windows 11 free of charge. The prerequisite for this, however, is that the hardware is suitably fit.
Requirements:
- Dual-core CPU (1GHz) with 64-bit support
- 4 GByte RAM
- 64 GByte memory
- UEFI firmware
- Secure Boot with TPM 2.0
- DirectX 12 compatible graphics card
- Display with at least 720p resolution
If you prefer to return to the Windows 10 start menu: This is how to do it
Microsoft obviously shows understanding for the habits of its loyal fans. That’s why Windows 11 includes an option that allows users to return to their beloved Windows 10 start menu in the blink of an eye. However, the programmers have hidden this option a little. But searching is supposed to be fun, as they say.
These are the steps to return to the Windows 10 Start menu:
- First, right-click on an empty space on the Taskbar on the taskbar.
- Then "Taskbar settings activate.
- If not set automatically, now in the left-hand bar "Personalisation in the left-hand bar.
- Now in the window "Taskbar behaviours or "Taskbar behaviours".
- Select the word " left " with the function " Taskbar alignment". This puts the start button, the fold-out start menu and other icons back in the usual place.
Those who like them can also bring back the tiles
Windows 10 Pro has caused a huge amount of displeasure among some users. The reason for the anger were the tiles that housed the apps in the Windows 10 Start menu. Some, however, found this to be more elegant and clear than the old design. Windows 11 does without the „tiling“. However, those who love them can also activate the design with a few steps and a few clicks:
- Open the registry editor with the search term "regedit".
- Now enter the command "ComputerHKEY_CURRENT_USERSoftwareMicrosoftWindowsCurrentVersionExplorerAdvanced" in the navigation bar.
- Now select "Advanced" in the sidebar with a right mouse click.
- A context menu appears in which "New - DWORD value (32-bit)" is selected.
- This new DWORD value is named "Start_ShowClassicMode".
- Double-click to open this new value, now enter a 1 under the password "Value" and save with "OK".
- To return to the tile start menu, you now only have to restart the computer.
Header Image: © monticellllo, stock.adobe.com

Windows 10 Quick Start: How to activate and deactivate it
Windows 10 Quick Start: How to enable and disable it
Sometimes it takes a small eternity until the computer is finally booted up. This is especially annoying when, for example, you have a customer on the phone and need urgent information, but it is stored on the computer. Then the duration of the slow start-up becomes a real test of patience. A remedy for this is the quick start, which allows Windows 10 to start up and shut down significantly faster. Normally it only takes a few seconds. Practical, isn’t it? And yet there can be good reasons to deactivate Windows 10 Quick Start. We explain what they are here.
This is what happens with Windows 10 Quick Start
When you start your computer on Windows 10 Home or Windows 10 Pro basically three system operations take place:
- Preboot, i.e. the authentication of the system
- Initialisation of the system and the driver
- Session Init, which means the actual starting of the session.
Once all this is done, the PC can accept the user’s login . With Windows 10 Quick Start, basically only the initialisation process is optimised. The slow start-up with seemingly endless duration can be avoided if the computer is also shut down in this mode beforehand. The entire system is then in a kind of sleep mode. That is, it is not shut down completely, only the programmes are closed and the users logged off. The most important system files for initialisation, which the PC needs immediately at start-up, are stored in a buffer called „hiberfil.sys“ – and are immediately ready for use again at the next start.
Why should you disable Windows 10 Quick Start?
On Windows 10 Home and Windows 10 Pro, the Quick Start feature is already enabled by default. Nevertheless, there are situations in which it is better not to use the function:
- When working with two operating systems on one computer, problems can arise especially with older versions of Windows (especially Windows 7!) and with Linux.
- If you use an SSD hard diskif you use an SSD hard disk, its service life is shortened by the permanent additional write operations.
- When working in a Network policies cannot be executed if they have "On start-up" as a condition.
- Included Software Distribution and Patch Management contain the rule "On restart", they will not work with the quick start function.
To disable the Windows 10 Quick Start
If there are any of the previously mentioned problems with your PC, it’s high time to disable the pre-installed Windows 10 Quick Start. Here’s how to do it:
- First open the Control Panel under Windows 10.
- In the category "System and Security then click on "Power Options.
- Now in the selection window select the option "Select what should happen when the power switch is pressed" select.
- Among other things, the following link appears "Some settings are not available at the moment"which must be clicked on.
- This is followed by a Security questionwhich you must answer with "Yes".
- Now scroll down and uncheck the option "Activate quick start (recommended)" uncheck it.
- As a last step, confirm the new settings under "Save changes".
Tip:
If you want to reactivate Windows 10 Quick Start, you have to perform the same steps again. However, set the corresponding check mark under „Activate Quick Start (recommended)“.
Everything only works when the hibernation function is activated
Windows 10 Quick Start is based on Hibernation Mode. This means that the PC is disconnected from the power supply in hibernation mode. However, if the hibernation function is already switched off – for whatever reason – deactivating Windows 10 Quick Start will not work. The options mentioned above are then not visible. If this is the case, the only thing that helps is to reactivate the default setting of the hibernation function.
- To do this, press the Windows key and X at the same time so that the command line appears.
- Here you have to start the admin prompt.
- The DOS window opens by entering the command powercfg /hibernate on is entered.
Header image: © 1STunningART, stock.adobe.com

Windows 10 Update: What can the new version do?
Windows 10 Update: What can the new version do?
And again there’s a new Windows 10 Update … You could almost get the impression that Microsoft sends a release to users every month. You can get confused and ask yourself: If I buy a new Windows 10, for example for my home office, what will the latest release do for me? Don’t worry – we’ll shed some light on this!
New Windows version, old Windows version - which one is installed?
Windows 11 is not on the horizon. Instead, regular updates will be made available to anyone who wants to buy Windows 10. The current release is called the October 2020 Update – or officially: 20H2 – and at first glance is „just“ a maintenance patch. The already announced „Windows 10 21H1“ will probably also be an update that mainly focuses on the maintenance service, while substantial innovations can probably be expected again in autumn with „Windows 10 21H2“. To take advantage of the update, one does not have to immediately buy a new Buy a new Windows 10. If you want to use the current 2004 version or the 1909 update of Windows 10, for example, for your Office software office software in your home office, you are on the safe side. Update problems such as a processor that is too slow, insufficient memory or too little RAM do not arise. The concern that the driver signatures may no longer work is also unfounded. To find out which Windows 10 version is installed, the following steps will help:
- Via the Start button to open the Start menu.
- At "Settings select the last item "Info" click on it.
- Now all the information about the Windows 10 version appears.
Download Windows 10 Update - nothing easier than that!
Of course, downloading the latest update is much more convenient than constantly buying a new version of Windows 10. And even non-professionals can do this in no time at all. The prerequisite, however, is that the PC is prepared for the new update. The most important element for this is that the computer is already updated to the May 2020 update. otherwise, 20H2 will be completely reinstalled as an operating system – and this can lead to annoying update problems, in the worst case even to a total system failure. Once the computer is ready for the release, everything usually runs smoothly:
- Click on "Settings" in the Start menu
- "Select "Update and Security
- "Click on "Check for updates
- Select the optional update "Functional update for Windows 10, version 20H2"
- Click on "Download and install".
- Restart the PC to activate.
Attention: Older Windows versions perform a complete upgrade of the system for installation. The whole process therefore takes much longer!
New update - new features!
The 20H2 update offers new ways to customise your PC, increases security and holds some creative features . Some interesting features are: Colour mode: under „Colours“ in the settings you can choose between light and dark mode. This makes it easier to work on the screen and is easier on the eyes. Tabs: Those who always open many tabs for websites will love this feature! Simply pin the most frequently used page to the taskbar, and by swiping the mouse you can then see and click on open tabs in the preview at a glance. Read aloud function: Use the screen magnifier to mark a section of text and select „Read aloud from here“. The text is then read aloud. Emoji keys: The key combination Windows + dot (.) is not only interesting for Facebook and Co. It opens the emoji area directly and makes posts, subject lines or email greetings look much friendlier. Cursor: Practical when reading, writing or correcting longer texts. Go to „Ease of use“ in the settings and click on „Text cursor“. The stroke is then coloured, making it easier to find.
Header image: © Tierney, stock.adobe.com
Windows 10 Home or Pro - which is right for me?
Windows 10 Home or Pro - which is right for me?
The competition never sleeps. Nevertheless, for the vast majority of users (especially in Germany), Microsoft’s Windows operating system is still the ultimate when it comes to applications on the PC. However, many are faced with the question when purchasing a new system: Windows 10 Home or Windows 10 Pro – what are the respective advantages and disadvantages? The following article describes which of the Windows 10 versions is the right one, what 32-bit or 64-bit is all about and everything else there is to know.
Windows 10 versions in comparison
To effectively find out which of the numerous Windows 10 versions suits you, it is first worth taking a look at the designations of the different editions.
- Education is an offer for educational institutions. This Windows 10 version contains education-specific default settings.
- Mobile is optimised for mobile devices such as tablets and smartphones.
- Home is the standard, which is generally ideal for private users.
- Pro is suitable for companies or freelancers who need more extensive professional tools for their work.
The competition never sleeps. Nevertheless, for the vast majority of users (especially in Germany), Microsoft’s Windows operating system is still the ultimate when it comes to applications on the PC. However, many are faced with the question when purchasing a new system: Windows 10 Home or Windows 10 pro – what are the respective advantages and disadvantages? The following article describes which of the Windows 10 versions is the right one, what 32-bit or 64-bit is all about and everything else there is to know.
Windows 10 versions in comparison
To effectively find out which of the numerous Windows 10 versions suits you, it is first worth taking a look at the designations of the different editions.
- Education is an offer for educational institutions. This Windows 10 version contains education-specific default settings.
- Mobile is optimised for mobile devices such as tablets and smartphones.
- Home is the standard, which is generally ideal for private users.
- Pro is suitable for companies or freelancers who need more extensive professional tools for their work.
Do I need 32 bit or 64 bit?
Whether Microsoft Office 32 or 64 bit is needed depends entirely on how fit your PC is – for the Windows 10 versions, this plays a subordinate role for the time being. However, older models – including Windows tablets that are getting on in years – often have too little power or no 64-bit processor at all. Here, of course, a Windows 10 home 32-bit version Pro is the order of the day. The 64-bit processor is especially interesting for a working memory with 4 GB or more. Because only with this can the memory for Windows 10 home 64 bit be used effectively. Newer computers usually have the powerful processor.
How to find out whether you can use Windows Home 32 bit or Windows Home 64 bit
In Windows 7 and Windows Vista, you must enter „Performance Information and Tools“ in the search via the „Control Panel“ button . In the entry, one then either clicks on „View and print details“ or on „View and print detailed performance and system information“, depending on the version. The item „System Type > System“ then shows which operating system the PC is currently running and whether Windows Home 32 Bit or Windows Home 64 Bit and also Microsoft Office 32 or 64 Bit can be used.
Header image: © piter2121, stock.adobe.com
Windows 8, Windows 7 oder Windows 10 Pro – was brauche ich?
Windows 8, Windows 7 oder Windows 10 Pro – was brauche ich?
Es hat sich viel getan in den vergangenen Jahren, seit Microsoft 1985 mit dem Betriebssystem Windows 1.0 den Computermarkt revolutionierte. Zahlreiche Versionen folgten, von denen einige sehr erfolgreich waren, andere hingegen eher für Unmut bei den Usern sorgten. Nach Windows NT, Windows 98, Windows XP oder auch Windows 8.1 ist heute das Betriebssystem Windows 10 Home beziehungsweise Windows 10 Pro das Maß aller Dinge. Das gibt es allerdings in unterschiedlichen Versionen. Welche man davon wirklich braucht, erklären wir hier.
Soll man jetzt auf Windows 10 Pro upgraden?
Wenn nicht jetzt, wann dann? könnte die Gegenfrage lauten. Für wirklich alte Windows Betriebssysteme gibt es schon seit einer gefühlten Ewigkeit keine neuen Programme mehr, erst recht keinen Support oder Updates.
Für Windows 7 (seit 2009), das immerhin noch auf rund 23 % aller Rechner installiert ist, endete der Support für Windows 7 im Januar 2020. Und Windows 8 beziehungsweise Windows 8.1 (seit 2012/2013) sieht ebenfalls seinem Ende entgegen. Hier läuft selbst der bereits erweiterte Support im Januar 2023 aus.
Ein Windows 8 Update kann aber Sinn machen, wenn das Betriebssystem über ausreichend Kapazität verfügt (64 Bit, mindesten 4 Gigabyte Arbeitsspeicher). Gleiches gilt für ein Windows 7 Update. Auch wenn es vor kurzem noch ein – unangekündigtes – neues Windows 7 Update gab, macht der Umstieg auf eines der aktuellen Betriebssysteme wie Windows 10 Home oder Windows 10 Pro also auf alle Fälle Sinn. Und zwar jetzt!
Welches Betriebssystem ist auf dem PC installiert?
Um herauszufinden, welche Version des Windows Betriebssystems aktuell auf dem Computer installiert ist, genügen 3 einfache Schritte:
- Nach dem Klick auf das Windows-Symbol (Start) „Systemsteuerung“ eingeben und Enter drücken.
- Weiter zu „System“ navigieren, hier erfährt man die Geschwindigkeit des Betriebssystems (32 oder 64 Bit).
- Unter „Windows-Edition“ steht die genaue Version des installierten Windows Betriebssystems.
Wer braucht Windows 10 Pro und wem genügt Home?
Nicht jeder PC-Anwender muss das fast 230 Euro teure Windows 10 Pro oder die weiteren Versionen dieses Betriebssystems auf seinem Rechner installieren beziehungsweise upgraden. Es kommt darauf an, wie der Computer genutzt wird. Windows 10 Home ist für rein private Anwendungen bestens geeignet. Mit dem neuen Sprachassistenten Cortana, Windows Hallo für die Anmeldung per Kamera und einer individuellen Anpassung des Starmenüs an die eigenen Bedürfnisse beinhaltet es alle wesentlichen Funktionen. Wer zusätzlich das kostenlose Tool Classic Shell installiert, kann optisch sogar zur Benutzeroberfläche von Windows 7 zurückkehren. Vor Hackerangriffen und Schadprogrammen schützt Windows Defender.
Windows 10 Pro greift zum einen auf alle Funktionen von Windows 10 Home zurück. Zum anderen sind Features eingebaut, die auch kleine Betriebe und fortgeschrittene User zufriedenstellen. Mit Remote Desktop zum Beispiel ist es möglich, von einem anderen PC aus auf den eigenen Computer zuzugreifen.
Das Programm BitLocker verschlüsselt die Inhalte der Festplatte und schützt sie so vor unbefugten Zugriffen. Interessant für mehrere Nutzer ist der Gruppenrichtlinien-Editor. Er ermöglicht Einstellungen, die das Windows 10 Pro genau an die persönlichen Bedürfnisse anpassen.
Windows 10 Education stellt eine besondere Lösung für Schüler, Studenten und Lehrer dar. Zum Kauf soll nur diese User-Gruppe sowie gemeinnützige Vereine berechtigt sein.
Zwar ist bei dieser Version Cortana nicht installiert, dafür aber zum Beispiel Windows to go, mit dem Betriebssystem und persönliche Daten etwa per USB-Stick auf einem anderen Rechner gestartet werden können. Die Sicherheit des Systems wird mit der Funktion AppLocker erhöht, die auch das Sperren einzelner Anwendungen ermöglicht.
Windows 10 Enterprise wurde speziell für Unternehmen mit mehreren Mitarbeitern entwickelt. Neben den üblichen Funktionen plus Windows to go und AppLocker lassen sich damit mehrerer Computer verwalten, und neue Updates können vor der Installation geprüft werden. Verkauft wird das Betriebssystem mit mehreren Lizenzen direkt an Unternehmen.
Header-Bild: © dennizn, stock.adobe.com
Windows 10 Lizenz kaufen – wo, wie und welche ist die richtige?
Windows 10 Lizenz kaufen – wo, wie und welche ist die richtige?
Mit Windows 10 steht Usern eine einheitliche Software-Plattform zur Verfügung, mit der unterschiedliche Gerätetypen bedient werden können. PC, Tablet, Laptop, Smartphone, Xbox, Internet – alles ist möglich! Das Komfort-Plus: Das Betriebssystem passt sich mit der Continuum-Funktion an das Endgerät an und erkennt automatisch, ob mit Maus, Tastatur oder per Touch gearbeitet wird. Wir erklären, worauf es beim Windows 10 Lizenz kaufen ankommt.
Zwischen diesen Versionen kannst du beim Windows 10 Lizenz kaufen wählen
Microsoft gibt für sein Betriebssystem keine neuen Versionsnummern mehr heraus – ab jetzt bleibt grundsätzlich alles bei Windows 10. Da es aber seit Erscheinen des Systems im Jahr 2015 einige Updates existieren, sind mehrere Versionen erhältlich. Die wichtigsten auf dem Markt sind derzeit folgende:
- Windows 10 S: Geeignet für Privatanwender und Bildungseinrichtungen. Das System ist für PC und Laptop optimiert, allerdings lassen sich ausschließlich Windows-Store-Apps nutzen. Als Browser ist lediglich Edge verfügbar.
- Windows 10 Home: Gedacht für Privatanwender auf dem PC oder Notebook. Der Browser Edge, der Sprachassistent Cortana sowie das App-Framework Continuum sind Standards.
- Windows 10 Pro: Für Privatanwender und kleine Unternehmen auf dem PC und dem Notebook geeignet.
- Windows 10 Enterprise: Ist für Unternehmen geeignet, läuft auf PC und Laptop.
- Windows 10 Education: Hierbei handelt es um einen Upgrade von Home und Pro, der für PC und Notebook für Schüler und Universitäten gedacht ist.
- Windows 10 Mobile: Im Privatbereich für Smartphone und Tablet gedacht.
- Windows 10 Mobile Enterprise: Die Mobile-Version für Unternehmen, die auf neueste Sicherheits-Upgrades angewiesen sind.
Windows 10 LTSC und LTSB wo liegen die Unterschiede?
Im Grunde genommen ist LTSC (Long Term Servicing Channel) eine Update-Version von LTSB (Long Term Servicing Branch). Das ältere Windows 10 LTSB hat mehrere Varianten mit unterschiedlichen Services:
Current Branch (CB):
Neue Features und Updates werden sowohl für für Privat- als auch für Geschäftskunden automatisch heruntergeladen.
Current Branch for Business (CBB):
Gilt ausschließlich für Geschäftskunden. Der Vorteil: Updates lassen sich zum Testen erst mal bis zu 8 Monate aufschieben.
Long Term Servicing Branch (LTSB):
Diese Variante war und ist für Geschäftskunden gedacht, die möglichst wenig an ihren bestehenden Systemen ändern wollen. Nur alle 2 bis 3 Jahre erscheinen hierbei neue LTSB-Versionen, die von den Kunden sogar abgelehnt werden können. Das aktuelle Windows 10 LTSC kommt ohne Current Branch und Current Branch for Business aus. An deren Stelle tritt der Semi-Annual Channel (SAC).
LTSC:
Diese Version ist für Großkunden gedacht, die alle zwei bis drei Jahr ein Update erhalten. Diese können wie vorher auch abgelehnt werden. Allerdings wird LTSC ausschließlich bei Enterprise Varianten angeboten, alle anderen Windows 10 Versionen sind davon ausgeschlossen.
SAC:
Ist für Privat- und Geschäftskunden geeignet und erhält zweimal pro Jahr ein Update der Features.
32 Bit oder 64 Bit – auch darauf solltest du achten, wenn du eine Windows 10 Lizenz kaufen willst
Die Größenordnung 64 Bit und 32 bezieht sich auf die Informationsverarbeitung des Prozessors, der im Computer verbaut ist. Ein größerer und schnellerer Prozessor ist das vor allem bei großen Programmen oder wenn mehrere Programme gleichzeitig zur Verfügung stehen sollen wichtig.
Hat das Betriebssystem des Rechners die 32 Bit-Variante eingebaut, lässt sich ein Arbeitsspeicher von maximal 4 Gigabyte (GB) nutzen.
Wie viel Bit hat mein Prozessor?
Wer eine Windows 10 Lizenz kaufen will, sollte natürlich wissen, wie viel Bit der Prozessor verarbeiten kann. Um das herauszufinden, geht man ganz einfach in 4 Schritten vor:
- Zuerst die „Windows-Taste“ drücken, dann im Suchfeld „Systemsteuerung“ eingeben.
- Dann im entsprechenden Fenster auf „System und Sicherheit“ klicken.
- Die Option „System“ wählen.
- Unter dem Eintrag „Systemtyp“ findet man heraus, ob 32 oder 64 Bit installiert sind.
Kann ich trotzdem eine 64 Bit Windows 10 Lizenz kaufen?
Dazu muss der Computer 64 Bit fähig sein.
- Steht im Eintrag „Systemtyp“ der Vermerk „x64-basierter Prozessor“, sind die Grundvoraussetzungen schon mal gegeben.
- Jetzt kommt es allerdings noch auf den Arbeitsspeicher an. Unter dem Menüpunkt „Installierter Arbeitsspeicher (RAM)“ sollte ein Wert von mindestens 4 GB eingetragen sein.
Header-Bild: © PhotoGranary, stock.adobe.com

Wie man Cortana deaktiviert
Wie man Cortana deaktiviert
Cortana ist eine Software von Microsoft und der persönliche Produktivitäts-Assistent des Anbieters. Er soll dabei helfen, Zeit zu sparen, damit sich die Nutzer auf das Wesentliche konzentrieren können. Es ist allerdings nicht eindeutig nachvollziehbar, was Cortana alles aufzeichnet und wo die Aufzeichnung der Sprachbefehle von Cortana landen. Diese Datenschutzprobleme führen dazu, dass viele Nutzen Cortana deaktivieren möchten.
Das Problem
Der Sprachassistent Cortana in Windows 10 wird von einigen Anwendern kritisch gesehen, weil Cortana im Verdacht steht, Daten von Anwendern in die Cloud zu übertragen und den Anwender zu überwachen. Cortana kann zwar nicht einfach gelöscht und deinstalliert werden, allerdings gibt es in Windows 10 einige Möglichkeiten das Tool zu deaktivieren. Besonders Anwendern mit Windows 10 Pro und Enterprise fällt es leicht, weil sie auf die Gruppenrichtlinien setzen können. In den kleineren Windows 10-Versionen muss man auf manuelle Einstellungen setzen.
Cortana deaktivieren
Cortana kann jederzeit deaktiviert werden – auf Wunsch bleibt dabei die Konfiguration aber erhalten. Wer noch die ursprüngliche Version von Windows 10 nutzt, kann Cortana schnell und einfach in den Einstellungen deaktivieren:
- Zum Deaktivieren in der Taskleiste auf das Suchfeld und danach auf der linken Seite auf das Notizbuchsymbol (drittes Symbol von oben) klicken, dann auf Einstellungen.
- Den Schieberegler bei Cortana kann Vorschläge, Ideen, Erinnerungen, Warnungen und vieles mehr anbieten auf „Aus“ schieben. An dieser Stelle kann man den Assistenten jederzeit wieder aktivieren.
Cortana in Windows 10-Versionen vor Anniversary Update (1607) deaktivieren
Auch ab Version 1607 und 1703 lässt sich Cortana weder deinstallieren, noch komplett entfernen. Man kann Cortana jedoch weitgehend aus dem System eliminieren, sodass der Assistent keine Daten mehr sammeln kann.
Nutzer mit Windows 10 Pro und Windows 10 Enterprise haben es etwas leichter: Sie können Cortana in den Richtlinieneinstellungen deaktivieren. Dazu muss man das Tool „gpedit.msc“ öffnen und zu ComputerkonfigurationAdministrative VorlagenWindows-KomponentenSuche navigieren. Auf der rechten Seite kann man etwa mit „Nicht im Web suchen und keine Webergebnisse in der Suche anzeigen“ verhindern, dass Anwender Cortana aktivieren und im Internet suchen.
Mit der Richtlinieneinstellung „Cortana zulassen“ kann man durch Setzen der Option „Deaktivieren“ Cortana auf allen Rechnern ausschalten, die diese Richtlinie verwenden. Die Anwender können dann lediglich die normale Suche nutzen, jedoch nicht mehr Cortana.
Cortana in Windows 10 Home über die Registry deaktivieren
In kleineren Windows 10-Versionen kann man Cortana ausschließlich über die Registry deaktivieren:
- Den Registry-Editor durch Eingabe von regedit.exe im Suchfeld des Startmenüs öffnen.
- Zum Pfad „HKEY_LOCAL_MACHINESOFTWAREPolicyManagercurrentdeviceExperience“ navigieren.
- Auf der rechten Seite den Eintrag „AllowCortana“ auf „0“ (null) setzen und den Computer neu starten.
Ist der Eintrag nicht vorhanden, wie folgt vorgehen:
- Mit der rechten Maustaste auf den Schlüssel „Experience“ klicken und aus dem Kontextmenü Neu DWORD-Wert (32-Bit) wählen. Dort dem Wert die Bezeichnung „AllowCortana“ geben und den Wert auf „0“ (null) setzen.
- Rechner neu starten. Im Suchfeld sollte der Eintrag „Windows durchsuchen“ statt „Frag mich etwas“ erscheinen.
Cortana deinstallieren
Wer experimentierfreudig ist, kann Cortana über ein inoffizielles Skript deinstallieren, das auf der Seite „deskmodder.de“ zu finden ist. Allerdings sollte man vor der Deinstallation eine vollständige Sicherung von Windows 10 durchführen, da keine Garantie besteht, dass das System dies unbeschadet übersteht. Die Ausführung des Skriptes ist ausschließlich für erfahrene Nutzer zu empfehlen.
Header-Bild: © monticellllo, stock.adobe.com